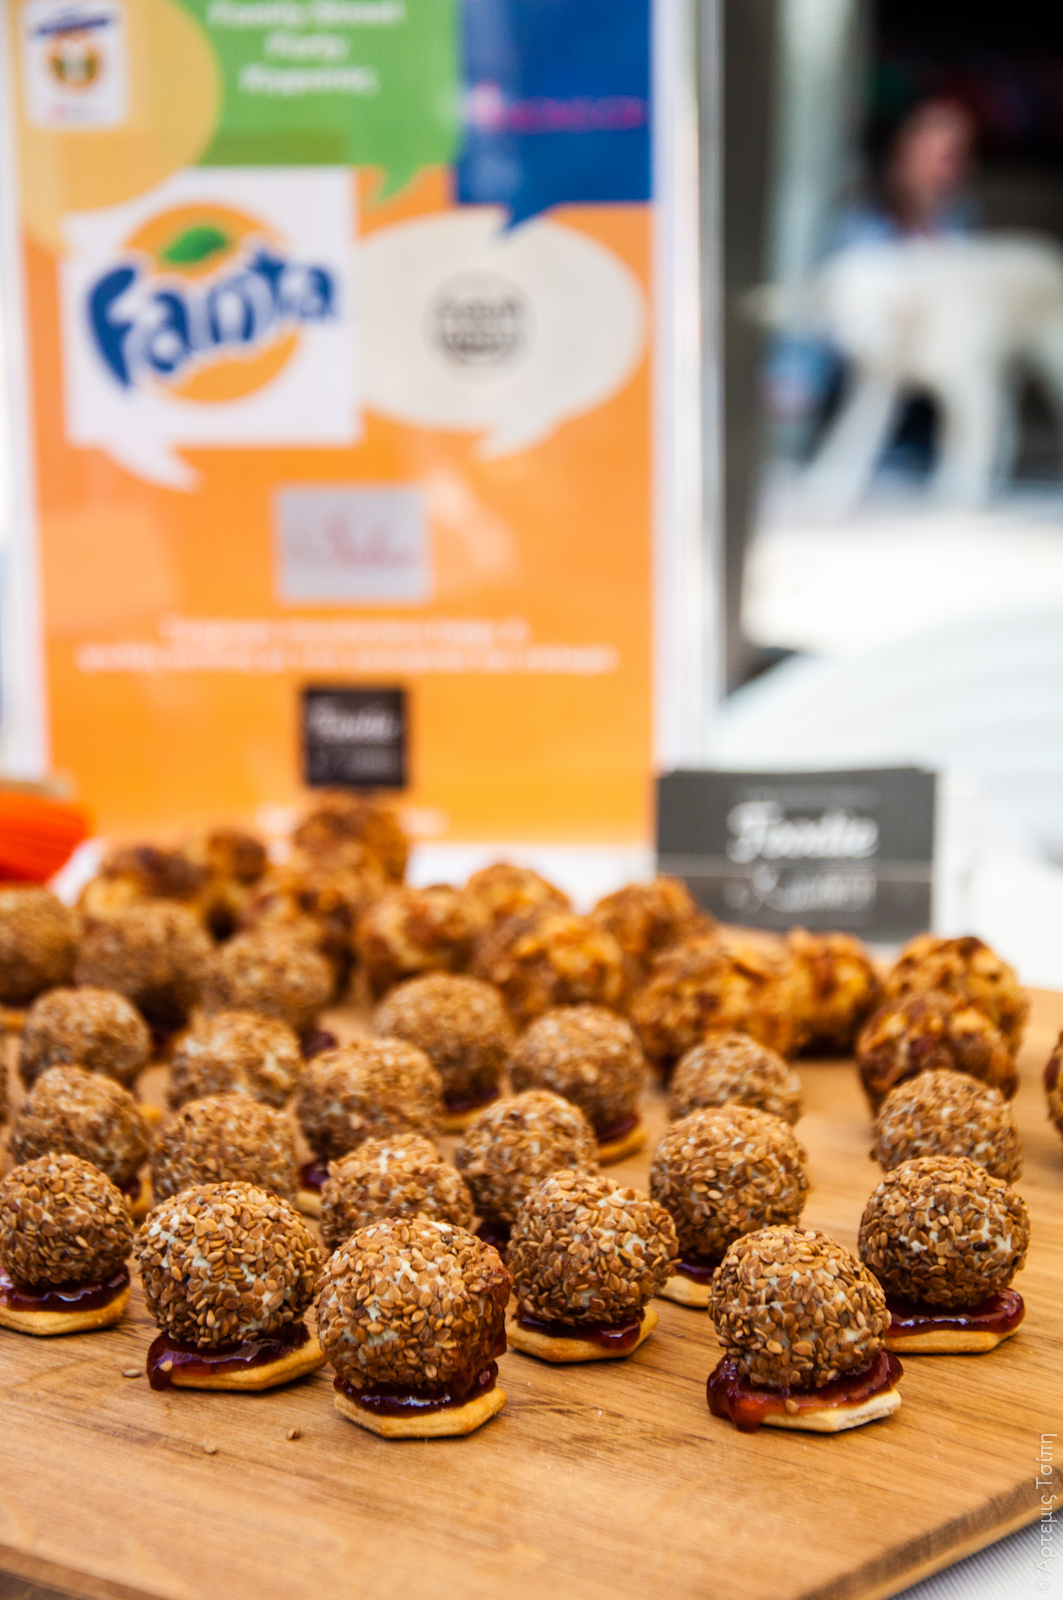
The blue cheese ones
So, I’ve really got to stop doing this. Showing up now and then with a recipe I’ve nicked from my Greek blog… But I couldn’t not share this one with you guys. I’m actually really proud of these cheese truffles (the fancy name for cheeseballs). Cheeseballs aren’t an achievement in themselves; they’re ridiculously easy to make. It’s the flavour combinations I’m going to brag about. I did a lot of research and found a lot of recipes, however none made me think “THAT one”. So I decided to sit my derriere down and make one up (or three). And these are what I came up with:
Feta and Honey with Date and Walnut Coating
Cheddar, Gouda and Apple with Caramelised Almond and Sultana Coating
Blue Cheese with Sesame Coating and Strawberry Jam on a Cracker
(mouthfuls, literally and otherwise!)

The cheddar ones (at the front) and the feta ones (at the back)
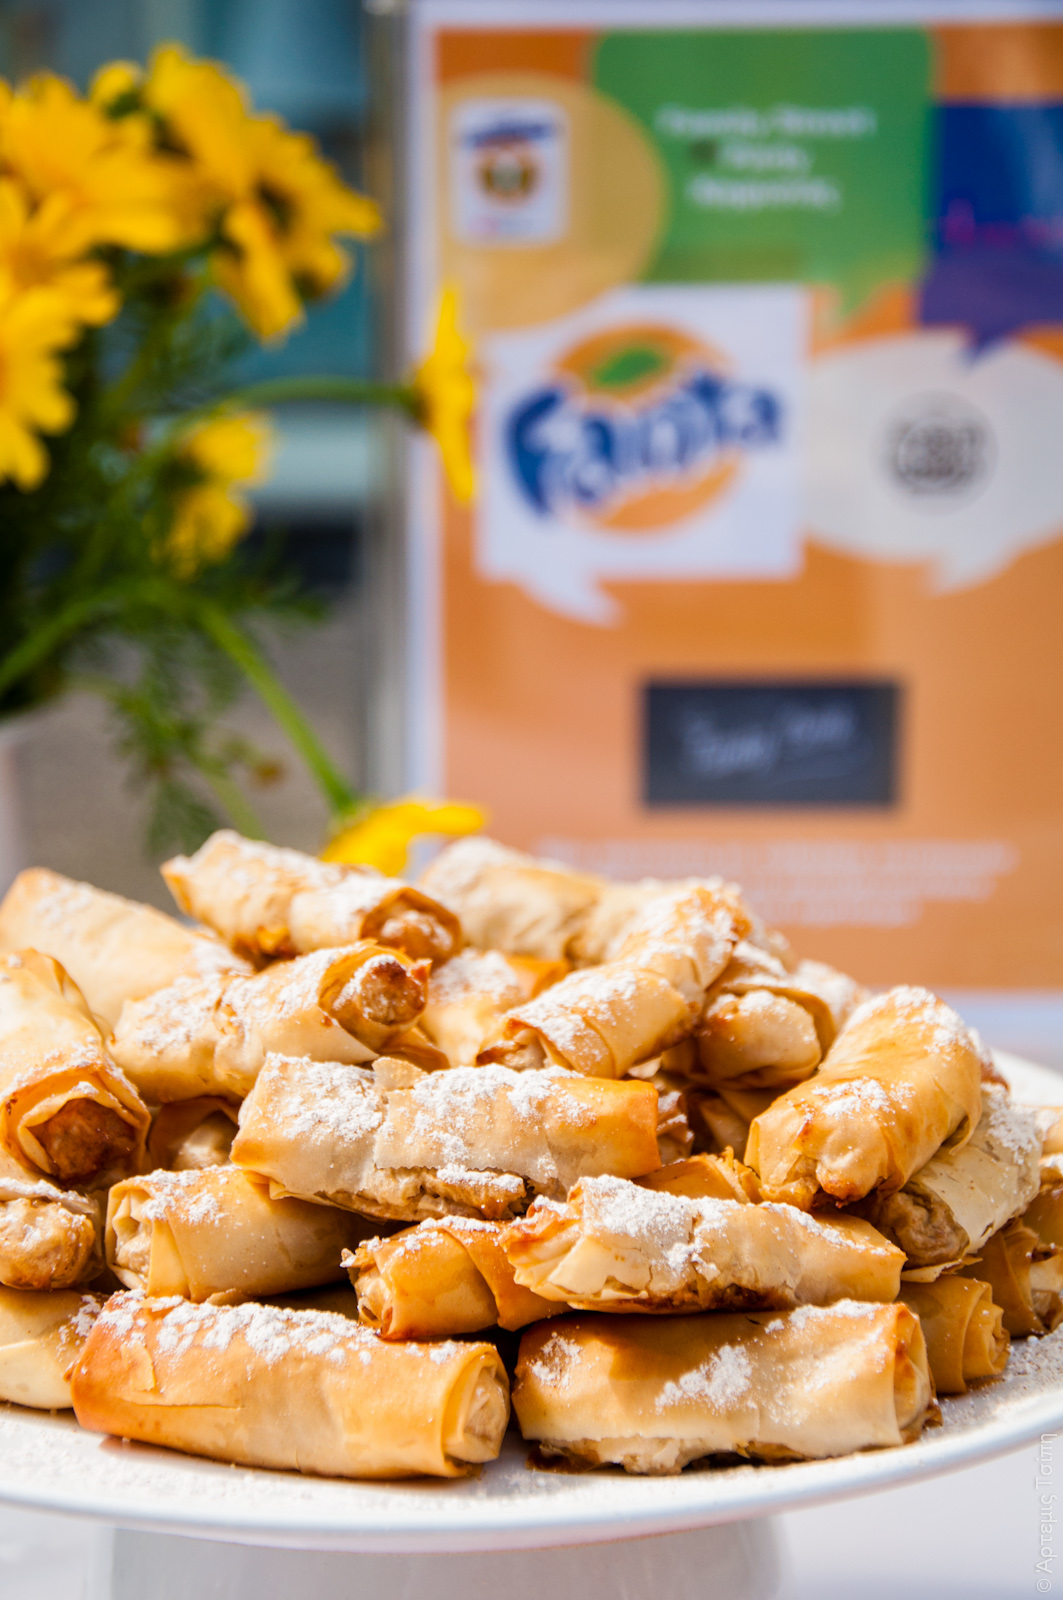
The reason I was searching high and low for a good cheeseball in the first place, was the fact that I had chosen this as my finger food contribution to a recent street party. I’m part of a group of food bloggers here in Athens called Food4Good. We organize or participate in events where people can come along and sample (well, gorge on usually) our creations, paying a small amount of money which all goes to various charities. In this case, we participated in a street party which also included music, kids’ arts & crafts, kids’ yoga and all sorts of cool attractions. It was smack bang in the middle of an upscale shopping area, on the Sunday before Easter. The shops were open and the weather was lovely, so you can imagine how busy it got! We had all sorts of goodies, both savoury and sweet. Feast your eyes on this lot.

Mini meat pies with bulgur wheat dough, by Elena is Cooking
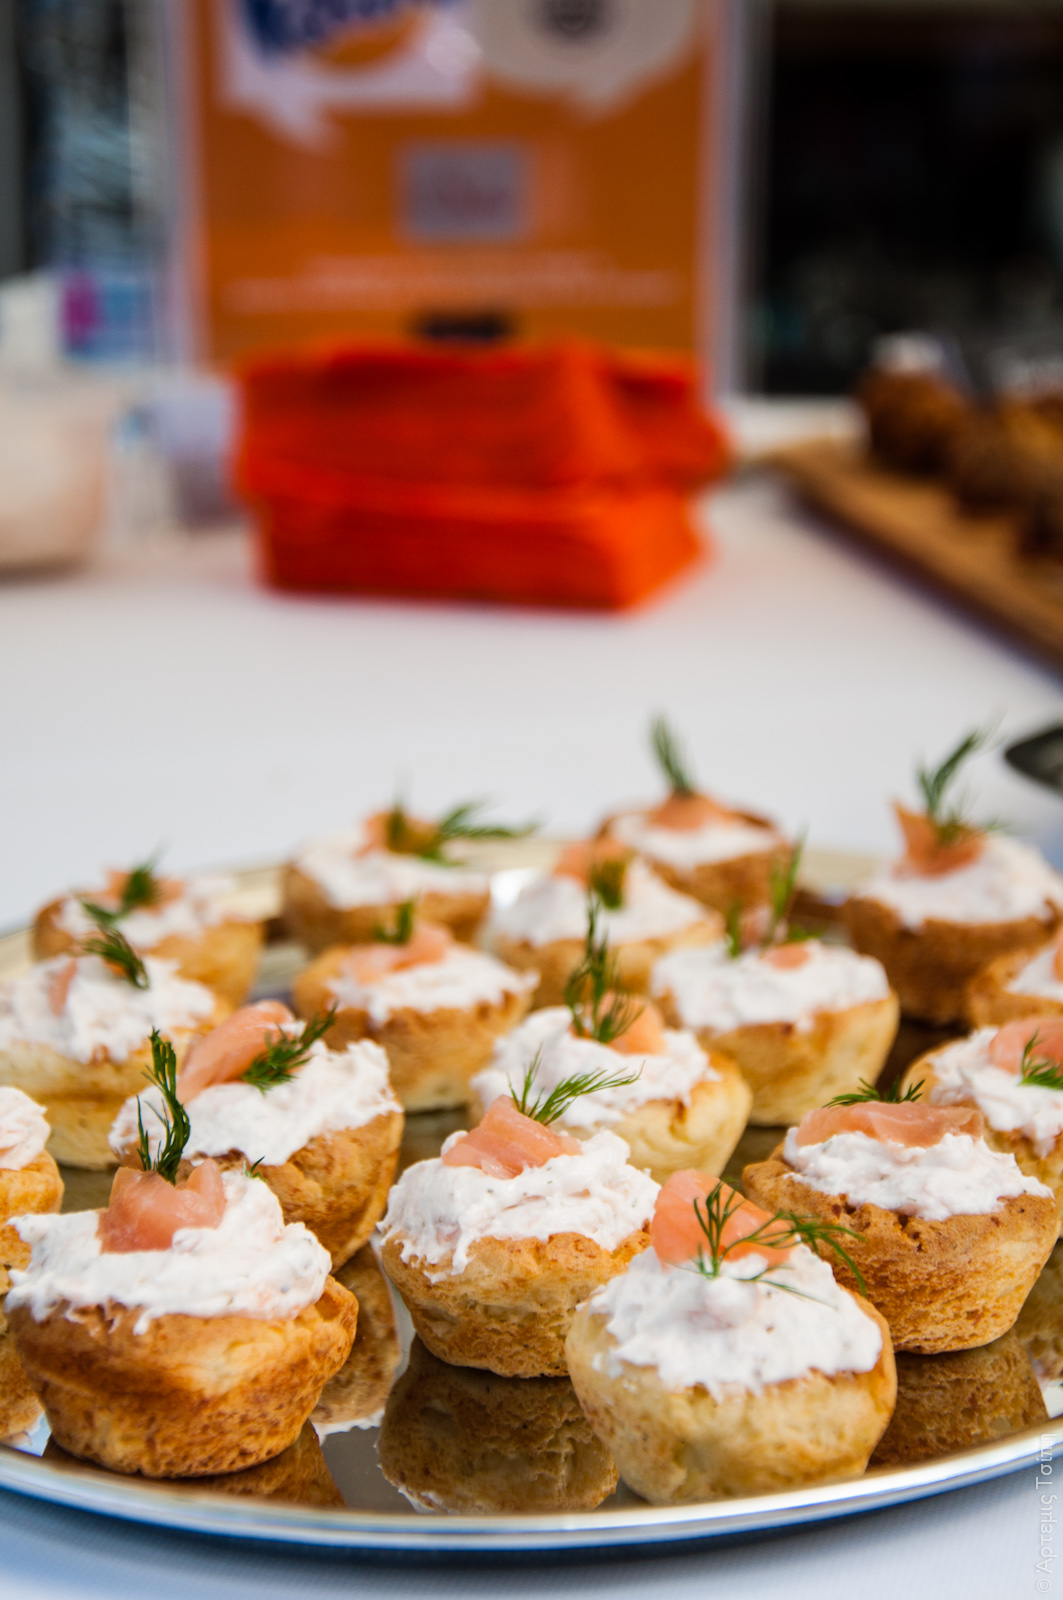
Smoked Salmon Potato Nests with Yogurt and Dill Filling by Sabor by Conna

Mini Tarts with Feta, Egg Bacon and Roasted Red Pepper Fillings by Wonderfoodland
Mini lenten apple pies by Funky Cook

Mini vanilla and chocolate cupcakes by Sugar Buzz

Mini pavlovas by Gourmelita
Before I move on to the recipes, I would like to once again thank Artemis Tsipi of Wonderfoodland, a fab food photographer and friend, who took all these beautiful shots and gave me permission to use them here. Check out her blog here (also in English, look for the links) and her lovely work.
And now, here goes:
Ingredients
Cheese Truffles (aka Cheeseballs)
Feta and Honey with Date and Walnut Coating
325 gr. feta cheese (choose a sturdy one, not a very soft one)
175 gr. cream cheese
2 Tbs + 1 ½ tsp honey
100 gr. walnuts, finely chopped
110 gr. dates, finely chopped
salty pretzel sticks (one for each cheese truffle)
Cheddar, Gouda and Apple with Caramelised Almond and Sultana Coating
200 gr. blanched almonds (for the coating)
1 Tbs + 2 tsp honey (for the coating)
1/2 tsp salt (for the coating)
1 tsp cinnamon (for the coating)
1/2 tsp (scant) freshly grated nutmeg (for the coating)
1/8 tsp freshly ground pepper (for the coating)
100 gr. sultanas, finely chopped (for the coating)
350 gr. mature cheddar, thickly grated (on a grater with large holes)
90 gr. gouda, thickly grated
150 gr. cream cheese
2 pinches (between 1/8 – 1/4 tsp) salt
1-2 green apples, chopped into small cubes
Blue Cheese with Sesame Coating and Strawberry Jam on a Cracker
350 gr. blue cheese
100 gr. butter, softened
30 ml brandy
1 tsp freshly ground pepper
1/4 tsp plus a pinch of salt (depends on saltiness of blue cheese)
toasted sesame seeds for coating
1/4 – 1/2 jar (100 to 180 gr.) strawberry jam
small salty crackers (one for each truffle)
Instructions
For the Feta and Honey Truffles
Mix/knead the cheeses and honey in a bowl with your hands. Take small amounts and shape into small balls. This mixture is soft and gooey so you might want to thump me at some point. Stay calm, wash your hands often (it helps) and persevere. It’s worth it. Put them on a plate and refrigerate for a while so they start firming up. Mix the chopped walnuts and dates in a bowl. One by one, place the cheeseballs into the mixture and roll them around till they are well coated. Pop onto a plate and refrigerate again for at least 4 hours. To serve, stick a pretzel in each so they look like lollipops.
For the Cheddar, Gouda and Apple Truffles
First make the caramelized almonds for the coating. Spread the almonds on a baking tray lined with greased parchment paper. Toast in preheated oven at 190C (fan) or 200C (conventional) for 7 minutes. Meanwhile, mix the rest of the coating ingredients except the sultanas, in a bowl. When the 7 minutes are up, add the almonds to the bowl, mix to cover well, return them to the baking tray (spaced apart slightly), and finish toasting for another 6 minutes. Timings may differ from oven to oven, but be careful as you can’t really tell if they are burning now they are coated in honey. Let cool and chop finely. Mix with chopped sultanas and set aside.
In a large bowl place the cheeses and salt, and mix well with your hands. Take a small quantity in your palm, shape into a ball and press a cube of apple into the centre. Close it up and continue with the rest of the cheese. Roll the balls into the coating mixture, pressing well so it sticks. This will be trickier than the feta ones, as the cheese won’t be so soft. Place the balls in the fridge.
For the Blue Cheese Truffles
Crumble the blue cheese into a large bowl, add the butter, brandy, salt and pepper, and mix with your hands. Try the mixture and add salt if necessary. Shape into very small balls (this one is strong) and roll in the toasted sesame seeds till coated. Place in the fridge till firm. To serve, smear a bit of jam on each cracker and pop a truffle on top. These should be eaten in one mouthful so you get all the different flavours at once!
Note: All the truffles need time in the fridge to firm up. However, they are best served at room temperature, so remember to take them out about 30 minutes to an hour before you start munching. Best thing about these guys? They actually taste better if they are made the day before. Perfect party food if you ask me.
Unfortunately not all the goodies pictured above are available, but here are two of them. Wish I had a couple of each right now…
Smoked Salmon Potato Nests with Yogurt and Dill Filling by Sabor by Conna
Mini Tarts with Feta, Egg Bacon and Roasted Red Pepper Fillings by Wonderfoodland
The coating for the cheddar truffles was inspired by these incredible almond snacks on Wonderfoodland.